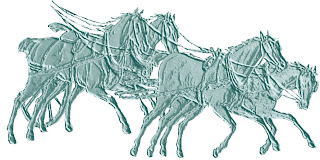
Making A Clear (Ice or Crystal-like)
Object in Photoshop Elements
1. Find a picture you’d like to convert. Like a Regency Mail Coach.
2. Select & save selected item in foreground, delete background. Best to have individual selections of different parts, such as “selection of horses”, “Selection of Coach WHEELS”, “selection of coach w/o wheels”, “Selection of People”, so you can control the amount and direction of light source.
3. Use “Sharpen” filter for details you want to be prominent. Use “Reduce Noise” filter, and/or eraser to smooth out areas you want to look smooth & icy.
4. Set your pallet Background Color to Dark Ice-Blue/light blue, or Black/light grey. It doesn’t matter what color is on top of pallets.
5. Select objects. In this case I just selected the horses.
6. Go to “Sketch” filter and apply “Bas Relief”, with “detail” at max and the “smoothness” feature adjusted to your preference (about 1/3 of the way up the scale for this picture). Use “left” or “right” light-source to highlight. Other light sources (upper left, bottom, etc) don’t seem to work too well.
 7. When you’ve made the whole drawing into a “Bas Relief”, duplicate it 2 times. Make the 2 top layers invisible.
8. On your LAYERS Pallet, select the bottom layer (#1) of the Bas Relief Object. Go to the upper right corner of the LAYERS pallet and check “Luminosity” filter. Leave “opacity” at 100% for now. Later you can adjust it to 75-85% if needed.
9. Leave the “Luminosity” layer visible.
10. Select the layer directly above the “Luminosity” layer (layer 2).
11. Go to upper right menu on this LAYERS pallet and click on “Screen” if your background is dark. Slide the opacity scale to about 50% or lower, depending on how much transparent area you want. This works best with darker backgrounds. This will lighten the already light areas as well as make translucent areas. If you want completely transparent area you can simply erase or delete the area.
11b. If your background will be light, use the "Darken" mode along with adjusting opacity down.
12. Place a colorful image in the Background. I chose an old map of England.
13. Here is the stage-coach with a different background:
14. To add some rainbow-sparkle, SELECT the 3rd (so far unused) stage coach layer.
15. Go to the “Effects” menu/pallet. Chose a highly colorful spectrum Effect. I chose “Nebula” for this sample, tho I don’t think the latest Photoshop Elements has it (I’m still using #6).
16. Lower the OPACITY to around 15-25%. This can go under or over the other stagecoach filters, whichever looks best to you.
So the important filters to use in making an object
translucent are: Sketch/Bas Relief, "Luminosity" and/or
"Screen" or "Darken" with very low (about 15%) Opacity.
After than you can do anything.


