
Saturday, June 2, 2012
La Belle Assemblee Sept 1807
I'm having difficulty scanning from the center of the book, as you can see by the blurring on the left side of the fashion plate. I finally broke down and ordere a "hand scanner", which will arrive some time next week.

Friday, June 1, 2012

Thursday, May 31, 2012


La Bell Assemblee, Princess of Wales

I'm having a little trouble scanning these. Even with my "new, improved" scanner. Some of the fashion plates are actually crammed into the binding of the book. I don't think even cutting them out (sacrilege!) would work.
Wednesday, May 30, 2012

Tuesday, May 29, 2012
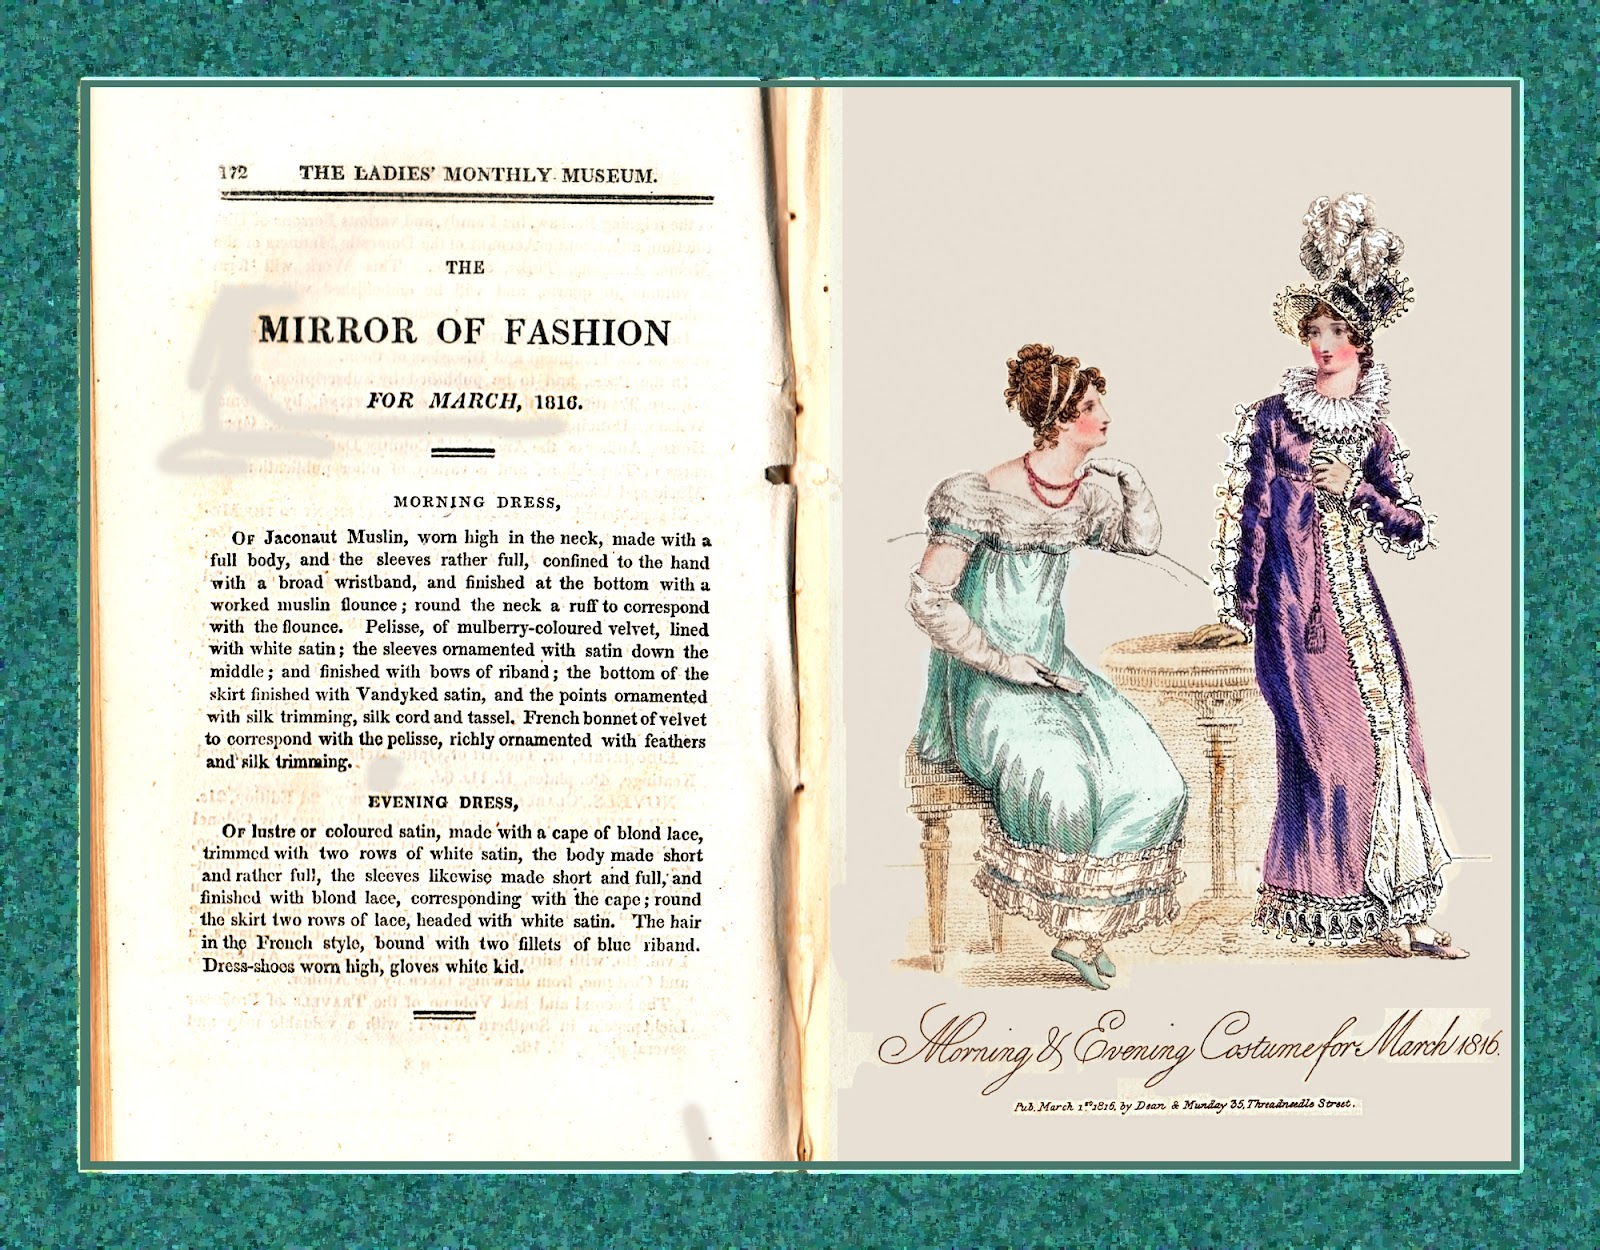
Ladies' Monthly Museum, May 1816

The scanner/printer/fax machine is really great. I dropped it when I was moving last October "CRASH! Tinkle-clunk". Goodbye lovely printer-scanner! So I bought another, exactly the same. Not too expensive, about $150.00 with shipping.
My first ever scanner (1990), which was only a scanner! cost $2,000.00 dollars. It was a bit larger, but other than that, does not compare to my current one.
Monday, May 28, 2012


Sunday, May 27, 2012

Saturday, May 26, 2012


Wednesday, April 25, 2012
Creating a Cut-out Lace picture
 |
| Layer 3 above Lace Background. |
Making a Lace design/insert
I'll start with just a "shape" from the Photoshop Elements shape files.
Open your finished "lace" Photoshop. It should have 2 layers: the dark-colored background and the white "lace".
1) Create a new layer (3) above layer 2.
2) Make sure your pallet has "white" as the top color.
3) Use the SHAPE tool to create a suitable insert. I chose a fleur-de-lis.
4) Go to LAYERS and apply: Simplify Layer. SAVE the object in SELECT filter.
 |
| Fleur-de-lis: simplified |
5) SELECT the object (fleur-de-lis)
Go to EDIT filter and assign 50% Opacity.
Assign FILL pallet with PATTERN.
For the Pattern: Chose the ARTIST's SURFACES pallet, and apply: GAUZE preset (64x64 pixels, greyscale to the fleur-de-lis). Now the fleur-de-lis looks a bit like Linen.
 |
| Fleur-de-lis with "gauze" filter added. |
7) Go to EDIT filter and select STROKE. Chose a width proportional to your design. On this one I chose 6 pixels on the OUTSIDE the object.
Opacity: 100% (of the preset 50% GRAY). APPLY.
The outline should be slightly grey.
8) Save the outline selection, Select the Outline.
 |
| Fleur-de-lis with OUTLINE (greyish) added outside. |
Set Add Noise to monochromatic, set Distribution: Uniform, Noise Amount: 25%.
APPLY to outline of object.
10) Go to FILTER: Motion Blur.
Set Motion Blur to 0 Angle, 5 Pixels long. APPLY
 |
| Fleur-de-lis with "Noise" added, and then 5 pix Motion Blur |
11) Before next step make your Pallets have the 25% grey on top, 50% grey background.
12) Go to FILTER: Sketch: BAS RELIEF
Chose: Detail: 15; Smoothness: 2
 |
| Bas Relief & Sharpen applied |
14) In ENHANCE filter go to: Adjust Lighting: LEVELS. In the (default) RGB channel, adjust the Far right lightness setting to 215.
Adjust the Middle Lightness Setting to 0.90
Leave other settings at default.
 |
| LEVELS adjustment added |
(Obviously the size & pressure are adjusted with the size & type of the picture you are making).
Now the Design Image is starting to look a little 3-Dimensional.
 |
| Liquify Filter (20%) added. |
I'll do something more challenging & fun tomorrow.
Subscribe to:
Posts (Atom)